Embedding a YouTube video into a threejs Scene
Date: 2024/04/17
This is probably my first actual blog post.
How do I render a YouTube video to a texture in a threejs WebGL scene?
It’s not possible.
Although threejs does provides a VideoTexture class to render the contents of a HTML video element, YouTube does not allow users to directly access the underlying media source file. Therefore, there is no way (that I know of) to render a youtube video onto a texture in the scene.
But fret not, for threejs has another trick up its sleeve. Enter the CSS3DRenderer, a renderer that applies 3D transformations to DOM elements via the CSS transform property.
Though it does come with several limitations, it is sufficient for the purposes of displaying a YouTube video together with WebGL content using threejs.
How do I use the CSS3DRenderer to display the YouTube video?
The method that I use is simple, but probably kind of hacky.
Simply render the embedded YouTube video’s iframe into an overlaying HTML Element.
The overlay sits on top of the WebGL canvas (using the ‘z-index’ CSS property), and perspective transformations done by the CSS3DRenderer make it seem as though the video is being rendered into the WebGL scene.
.overlay {
    position: fixed;
    top: 0;
    left: 0;
    outline: none;
    width: 100vw;
    height: 100vh;

    z-index: 2;
}
Code Snippet: Overlay CSS
const css3DRendererSetup = (surface: HTMLDivElement) => {
	const css3DRenderer = new CSS3DRenderer({ element: surface });
	css3DRenderer.setSize(window.innerWidth, window.innerHeight);
	return css3DRenderer;
}
Code Snippet: Initializing a CSS3DRenderer
const render = () => {
    ...
	css3DRenderer.render(cssScene, camera);
}
Code Snippet: Rendering a scene using the CSS3DRenderer
if (object instanceof THREE.Mesh) {
    const geometry = object.geometry;
    geometry.computeBoundingBox();
    const boundingBox: THREE.Box3 = geometry.boundingBox;

    const magicOffset = 5;
    const magicScale = 0.01;

    boundingBox.min.y -= magicOffset;
    boundingBox.max.y -= magicOffset;

    const screenPosition = boundingBox.min.clone()
        .add(boundingBox.max)
        .divideScalar(2);

    //create css3D object
    css3DRenderer.domElement.append(element);
    const css3DObject = new CSS3DObject(element);
    css3DObject.position.copy(screenPosition);
    css3DObject.rotateY(Math.PI);
    css3DObject.scale.setScalar(magicScale);
}
Code Snippet: Adding a CSS3DObject to the scene.
Code quality aside, the above code creates a new CSS3DObject and adds it to the “CSS Scene”, where it will later be rendered by the CSS3DRenderer.
As long as the transforms match up, the illusion of the YouTube video appearing to be part of the WebGL scene should appear nearly flawless (as long as the user doesn’t decide to resize the browser’s zoom, which is one of the limitations of the CSS3DRenderer at time of writing).
Side Note: Due to some bad decisions made during the 3D modeling process, I had to resort to using some magic numbers to make the geometry fit properly within the scene.
How do I control the YouTube video from within the scene?
See the YouTube Player API.
I can see the YouTube video through walls! What do I do?
Naive occlusion
Let us assume that we just want to display the YouTube video on some sort of plane.
Therefore, let us generate 4 “control points” to determine the visibility of said plane, and then perform some simple raycast checks to determine if the YouTube video should be rendered from the user’s point of view.
if (object instanceof THREE.Mesh) {
    const geometry = object.geometry;
    geometry.computeBoundingBox();
    const boundingBox: THREE.Box3 = geometry.boundingBox;

    const magicOffset = 5;
    const magicScale = 0.01;

    boundingBox.min.y -= magicOffset;
    boundingBox.max.y -= magicOffset;

    const screenPosition = boundingBox.min.clone()
        .add(boundingBox.max)
        .divideScalar(2);

    //lets naively assume that z forward is normal for now
    //project to x and y

    const v = boundingBox.max.clone().sub(boundingBox.min);

    const pB = boundingBox.max.clone();
    const pC = boundingBox.min.clone();

    const vCA = v.clone().projectOnVector(new THREE.Vector3(0, 1, 0));
    const vCD = v.clone().projectOnVector(new THREE.Vector3(1, 0, 0));

    const pA = pC.clone().add(vCA);
    const pD = pC.clone().add(vCD);

    //create css3D object
    css3DRenderer.domElement.append(element);
    const css3DObject = new CSS3DObject(element);
    css3DObject.position.copy(screenPosition);
    css3DObject.rotateY(Math.PI);
    css3DObject.scale.setScalar(magicScale);

    //visibility points for occlusion check
    css3DObject.userData.visibilityPoints = [pA, pB, pC, pD];
    cssScene.add(css3DObject);
}
Code Snippet: Computing visiblity points for occlusion check.
const checkIntersectingObjectsForCSS3D = () => {
	//naive intersect check for occlusion, idk
	cssScene.children.forEach((child) => {

		//making a kinda hacky assumption here
		if (!child.userData.visibilityPoints)
			return;

		//assume hidden unless any "control" point is visible, or something like that
		child.visible = false;
		child.userData.visibilityPoints.forEach((point) => {
			raycaster.set(camera.position, point.clone().sub(camera.position));
			const intersects = raycaster.intersectObjects(scene.children);

			let nearestObjectIndex = 0;
			while (intersects.length > nearestObjectIndex && intersects[nearestObjectIndex].object.type == "Sprite") {
				nearestObjectIndex++;
			}

			//temp hardcode
			if (intersects.length > nearestObjectIndex
				&& intersects[nearestObjectIndex].object.name == "Screen4Mesh"
				|| intersects[nearestObjectIndex].object.name == "Screen4Mesh_1") {
				child.visible = true;
			}
		});
	});
};
Code Snippet: Hardcoded checks for visibility
Proper occlusion
What if I want proper occlusion? To do this, we can try to compute the fragments that overlap with the youtube video. Using the previously computed visiblity points, we can define a region in world space that corresponds to the viewable area of the YouTube video.
My current method involves taking these visiblity points, converting them to screen space (or NDC), and then computing the overlapping fragments to use as a mask for the embedded YouTube iframe. I am sure that there are more efficient ways to go about this, but I decided to stick with this one for now.
To compute these overlapped fragments, I use a second render pass, where I pass in the points defining the YouTube video’s viewable region. In the vertex shader, these points are transformed to clip space coordinates, and passed onto the fragment shader for further processing.
To prevent the shader from checking objects that are behind the YouTube video’s “geometry”, the distance of each vertex from the camera (in world space), is compared with the distance of each visiblity point from the camera. If the distance of the vertex from the camera is greater than all of the visiblity points’ distances, then it must be behind the viewing plane of the YouTube video (I think). In hindsight, maybe doing a dot product with the plane’s normal would be a better idea?
Anyway, the smallest distance difference (between each vertex and each visiblity point) is stored in a varying variable and passed to the fragment shader for further processing.
Finally, in the fragment shader, edge equations are used to check if each fragment is within the viewable region of the YouTube video on the screen. Fragments outside the region are discarded, as well as fragments that are “behind” the viewing plane of the YouTube video.
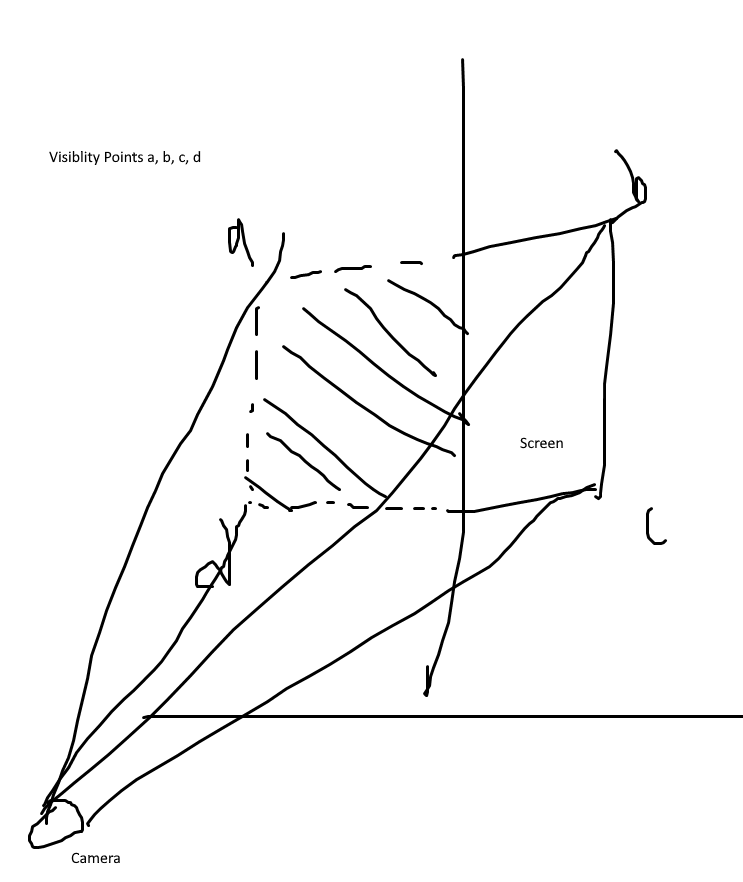
Hastily drawn diagram: Visibility points for occlusion check
<script type="x-shader/x-vertex" id="occludevertex">
    uniform vec3 u_points[4];
    uniform vec3 u_camera_pos;
    uniform float u_distances[4];

    varying vec3 v_points[4];
    varying float v_occluding;

    void main() {
        vec4 pos = modelMatrix * vec4(position, 1.0);
        float distance_to_camera = length(pos.xyz - u_camera_pos);

        for (int i = 0; i < 4; ++i) {
            vec4 point = projectionMatrix * viewMatrix * vec4(u_points[i], 1.0);

            if (point.w > 0.0)
                v_points[i] = point.xyz / point.w;
        }

        v_occluding = 0.0;
        for (int i = 0; i < 4; ++i) {
            v_occluding = min(v_occluding, u_distances[i] - distance_to_camera);
        }

        gl_Position = projectionMatrix * viewMatrix * pos;
    }
</script>
Code snippet: Occlude vertex shader
<script type="x-shader/x-fragment" id="occludefragment">
    uniform vec2 u_resolution;
    varying vec3 v_points[4];
    varying float v_occluding;

    vec3 edge_eqn(vec2 p0, vec2 p1) {
        //a, b, c
        return vec3(p0.y - p1.y, p1.x - p0.x, p0.x * p1.y - p1.x * p0.y);
    }

    bool point_in_edge(vec3 edge_eq, vec2 p) {
        if ((edge_eq.x * p.x + edge_eq.y * p.y + edge_eq.z) >= 0.0)
            return true;

        return false;
    }

    void main() {
        if (v_occluding < 0.0)
            discard;

        vec2 st = gl_FragCoord.xy / u_resolution;
        vec2 points[4];

        for (int i = 0; i < 4; ++i) {
            points[i] = vec2((v_points[i].xy + 1.0) / 2.0);
        }

        vec3 e0 = edge_eqn(points[0], points[1]);
        vec3 e1 = edge_eqn(points[1], points[3]);
        vec3 e2 = edge_eqn(points[3], points[2]);
        vec3 e3 = edge_eqn(points[2], points[0]);

        if (point_in_edge(e0, st) && point_in_edge(e1, st) && point_in_edge(e2, st) && point_in_edge(e3, st))
            gl_FragColor = vec4(0.0, 0.0, 1.0, 1.0);
        else
            discard;
    }
</script>
Code snippet: Occlude fragment shader
Below are some examples of the fragment shader in action, the overlapping fragments/pixels are rendered in white.
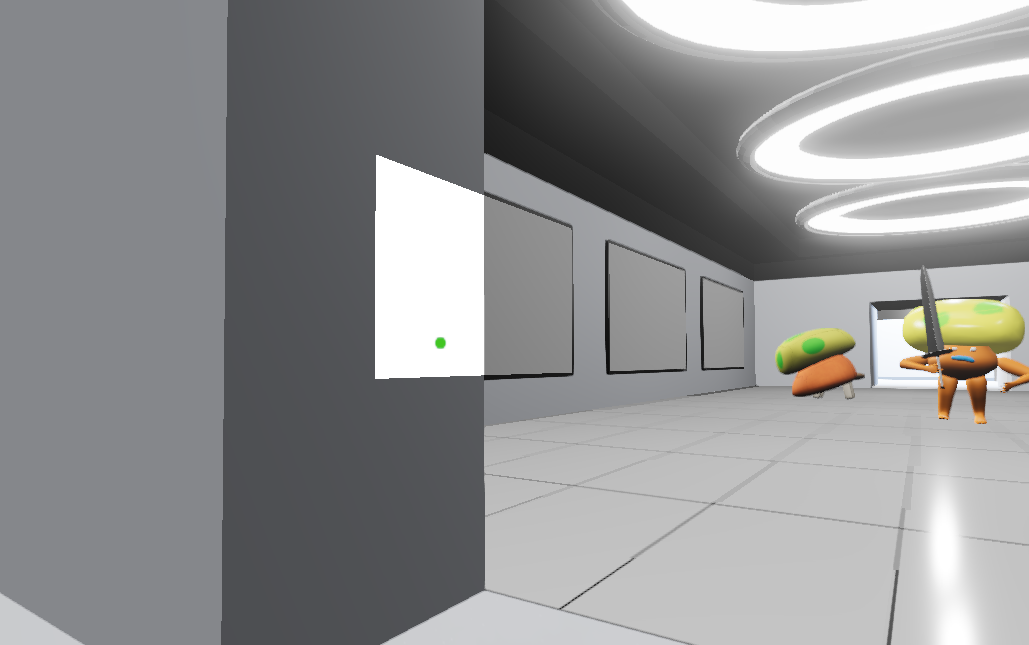
Screenshot: Occluding fragments from behind wall
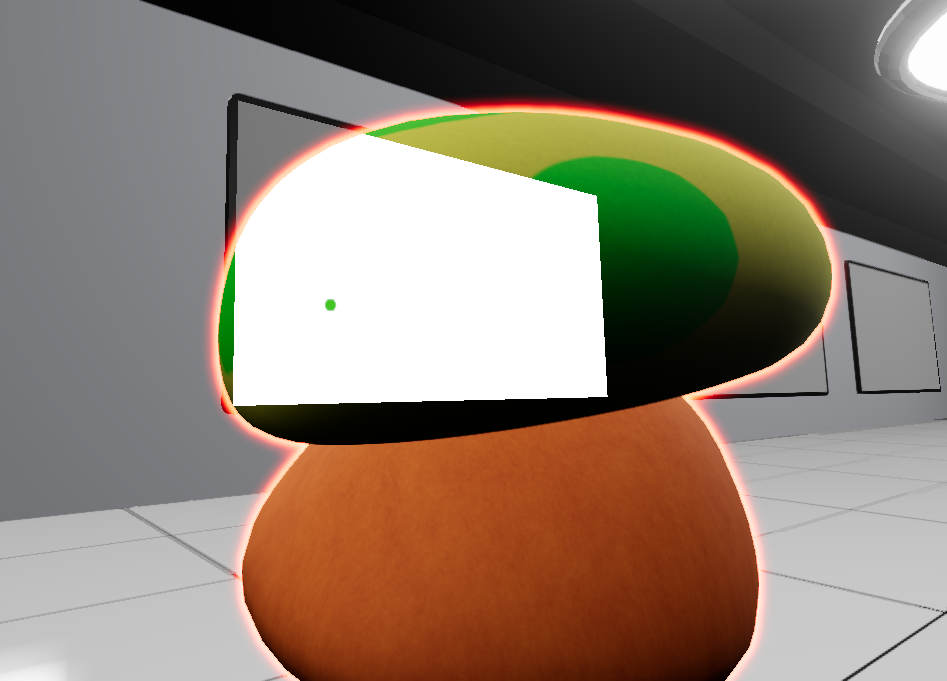
Screenshot: Occluding fragments from behind mushroom
Masking
Now that we have the overlapping pixels, we can use these pixels with a CSS mask to hide the parts of the YouTube video that are “occluded”. Alternatively, we should be able to use CSS clip-path to do the same thing, but this would require additional computation (Convex Hull probably).
As we currently only have the overlapping fragments, we first have to “invert” the mask, which can be done using the “exclude” mask composite operation. See: https://developer.mozilla.org/en-US/docs/Web/CSS/mask-composite
const setOccludeMaskForCSS3DRenderer = () => {
	occludeMaskImageURL = occludeRenderer.domElement.toDataURL();
	css3DRenderer.domElement.style.maskMode = "luminance";

	css3DRenderer.domElement.style.maskImage = "url(" + occludeMaskImageURL + "), linear-gradient(white, white)";
	css3DRenderer.domElement.style.maskComposite = "exclude";
}
Code Snippet: Setting the mask
Results
Using the generated mask, we can fake the illusion that the embedded YouTube video exists within the WebGL scene, unfortunately, this method absolutely destroys the FPS of the experience, making it less than ideal for an immersive experience. Future optimizations are required.
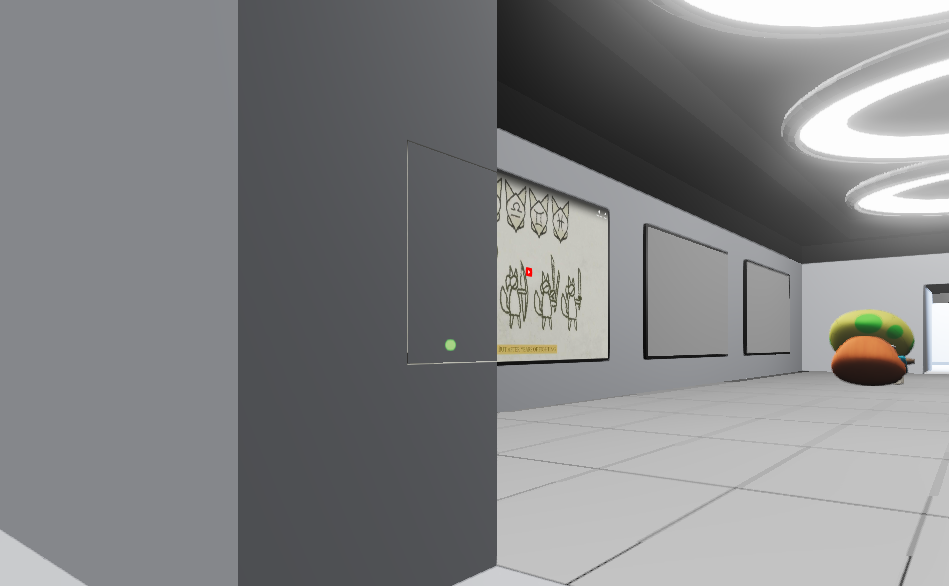
Screenshot: Result with artifacts
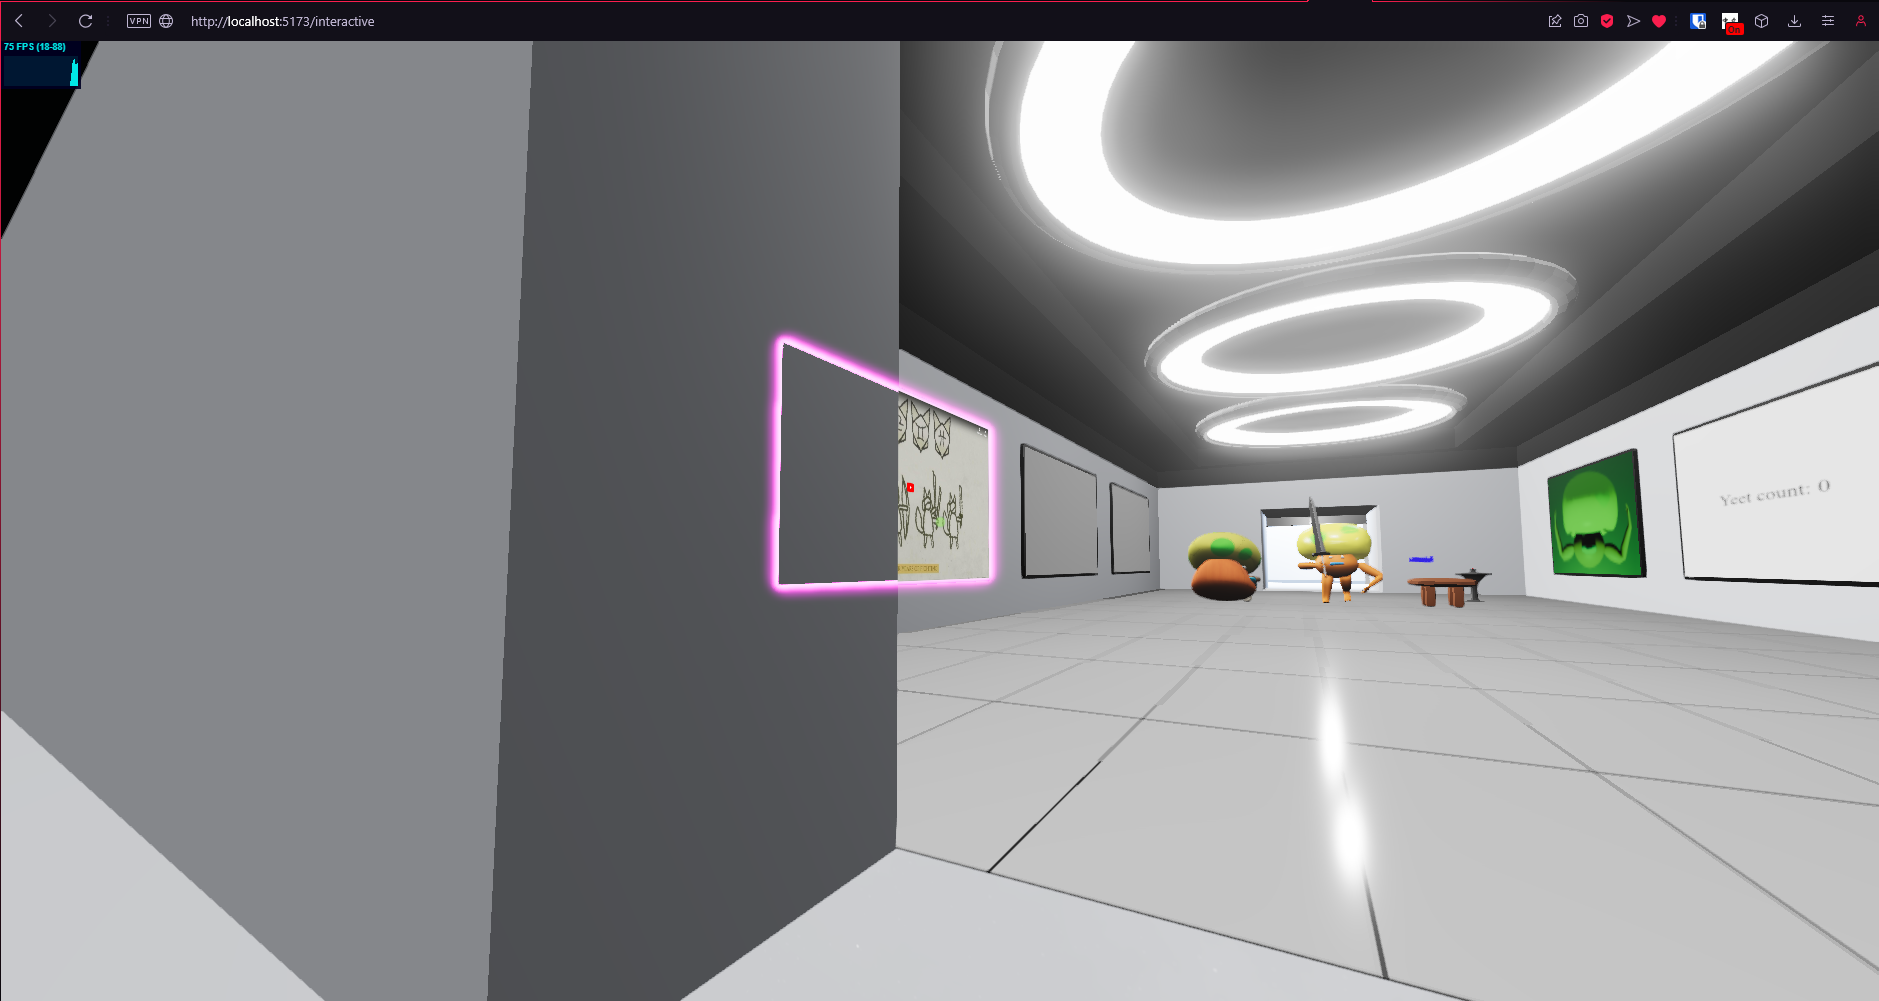
Screenshot: Final Result
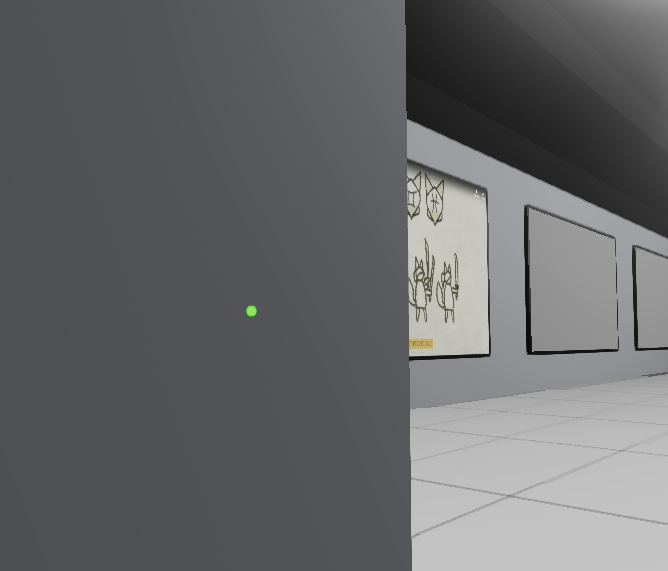
Screenshot: Final Result 2
